
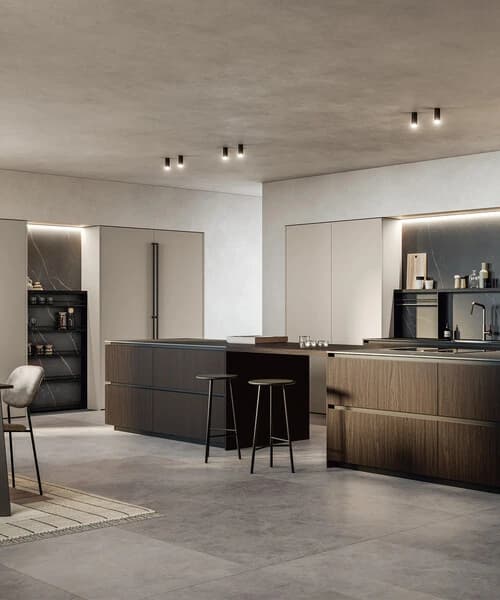

Plinth height is one of those specification details that rarely appears on a mood board yet quietly shapes how a kitchen feels to stand in and how much cabinet volume sits above the floor. Most fitted kitchens use a plinth somewhere between 100 mm and 150 mm. Reducing that figure sounds like a straightforward win, but the relationship between plinth, cabinet height, worktop, and usable storage is more layered than it first appears. This worked example uses a single hypothetical run to trace what actually changes, and what does not.
Setting Up the Hypothetical Run
Imagine a standard 900 mm total height from finished floor to worktop underside, a common target in British kitchen design. Within that envelope, every millimetre given to the plinth is a millimetre taken from the cabinet carcass below the worktop. The worktop itself sits on top of the carcass, so its thickness is separate. For this example, assume a 40 mm worktop and a fixed 900 mm floor-to-worktop-surface target, leaving 860 mm for carcass plus plinth combined.
The Numbers: 150 mm Plinth vs 30 mm Plinth
With a 150 mm plinth, the external carcass height is 860 mm minus 150 mm, giving 710 mm. Round to a practical 730 mm once tolerances are absorbed. With a 30 mm plinth, the lower end of what is structurally feasible in a bespoke run, the external carcass height becomes 860 mm minus 30 mm, or approximately 850 mm. The difference in external carcass height is roughly 120 mm. That is the headline figure this article is built around, and it is worth being precise: this is a gain in external cabinet height, not a guaranteed gain in internal storage volume.
What the 120 mm Actually Represents
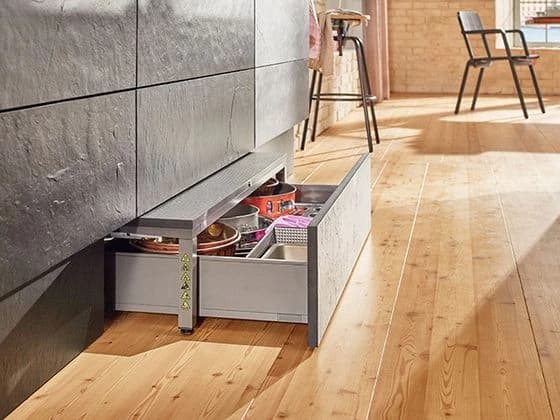
Internal storage depends on carcass construction thickness, shelf positions, and what hardware occupies the interior. A 120 mm taller external carcass does not translate to 120 mm of additional usable shelf space. Panel thickness, drawer box heights, and the geometry of hinges and runners all consume some of that gain. In practice, a taller carcass may allow one additional shelf position, or a deeper drawer stack, but the precise yield depends on the specific interior layout chosen at the design stage. Treat the 120 mm as potential headroom, not guaranteed shelf depth.
Toe Comfort and Floor-Level Ergonomics
A plinth exists partly to protect the cabinet base from cleaning water and foot traffic, and partly to allow a person to stand close to the worktop without their toes pressing against the carcass. The height and setback of the plinth together determine the available toe recess; comfort should be reviewed with the actual users. At 30 mm, that recess is minimal. For most adults, a very low plinth means standing slightly further from the worktop or accepting that the toe of a shoe will contact the cabinet face. This is not a dealbreaker, but it is a genuine ergonomic trade-off that should be tested with the actual users of the kitchen before committing to the specification.
Inaccessible Voids and Appliance Considerations
One reason designers retain a generous plinth is that the void beneath the cabinet can house services, pipework, cables, levelling feet, without those elements intruding into the cabinet interior. A 30 mm plinth leaves very little room for levelling feet, which means the cabinet base itself must be precisely level, or an alternative levelling strategy must be built into the carcass design. Under-counter appliances with their own plinths or ventilation requirements may also conflict with a very low external plinth. These are solvable problems in a bespoke context, but they require early coordination rather than a late specification change.
When a Lower Plinth Makes Sense
A reduced plinth tends to work best in kitchens where the floor is reliably flat and dry, where the design aesthetic calls for a furniture-like or floating appearance, and where the cabinet run does not include appliances with conflicting ventilation needs. In the worked example, the finished worktop level stays the same: changing the cabinet envelope does not raise the working surface. If a different working height is needed, assess that as a separate design decision. In a bespoke project, the plinth height can be treated as a genuine design variable rather than a default, which is precisely where early conversation with your designer pays off. At Nura Interiors, optional 30 mm plinths are considered where the floor conditions and cabinet configuration make them feasible, and the decision is worked through at the design stage rather than applied as a blanket rule.
Comparing the Same Hardware Across Both Heights
If the same drawer runners, hinges, and internal fittings are specified in both the 730 mm and 850 mm carcass, the taller cabinet will typically accommodate a deeper drawer stack or an additional internal shelf. However, the bottom drawer or shelf in the taller cabinet sits closer to floor level, which can make it harder to access, particularly for items stored at the very base. A 30 mm plinth means the lowest drawer front begins very close to the floor, and bending or crouching to reach it may offset some of the ergonomic benefit gained elsewhere. This is worth modelling with your designer using actual drawer box heights before finalising the specification.
Making the Decision in Your Own Project
The worked example above is hypothetical and uses round numbers to illustrate the principle. Real projects involve specific floor conditions, appliance schedules, and user heights that will shift every figure. The honest conclusion is that a lower plinth can increase external cabinet height by a meaningful amount, around 120 mm in the scenario above, but whether that translates into storage you will actually use depends on the interior layout, the ergonomics of your household, and the structural feasibility of the floor. If you are weighing this decision for a current project, the Nura Interiors consultation process is a good place to work through the specifics with a designer who can model the options against your actual kitchen dimensions. You might also find the broader guide to planning a galley kitchen in London useful if you are working with a linear run where every millimetre of height matters.
Planning your next step
Use this guide as a starting point for your own brief. Compare the room, materials and practical requirements with the way you want the space to work.
Read the bespoke kitchen planning guide or explore Nura bespoke kitchen services before discussing your project.
Ready to discuss the brief? Contact the Nura studio to share your plans, questions and priorities.