
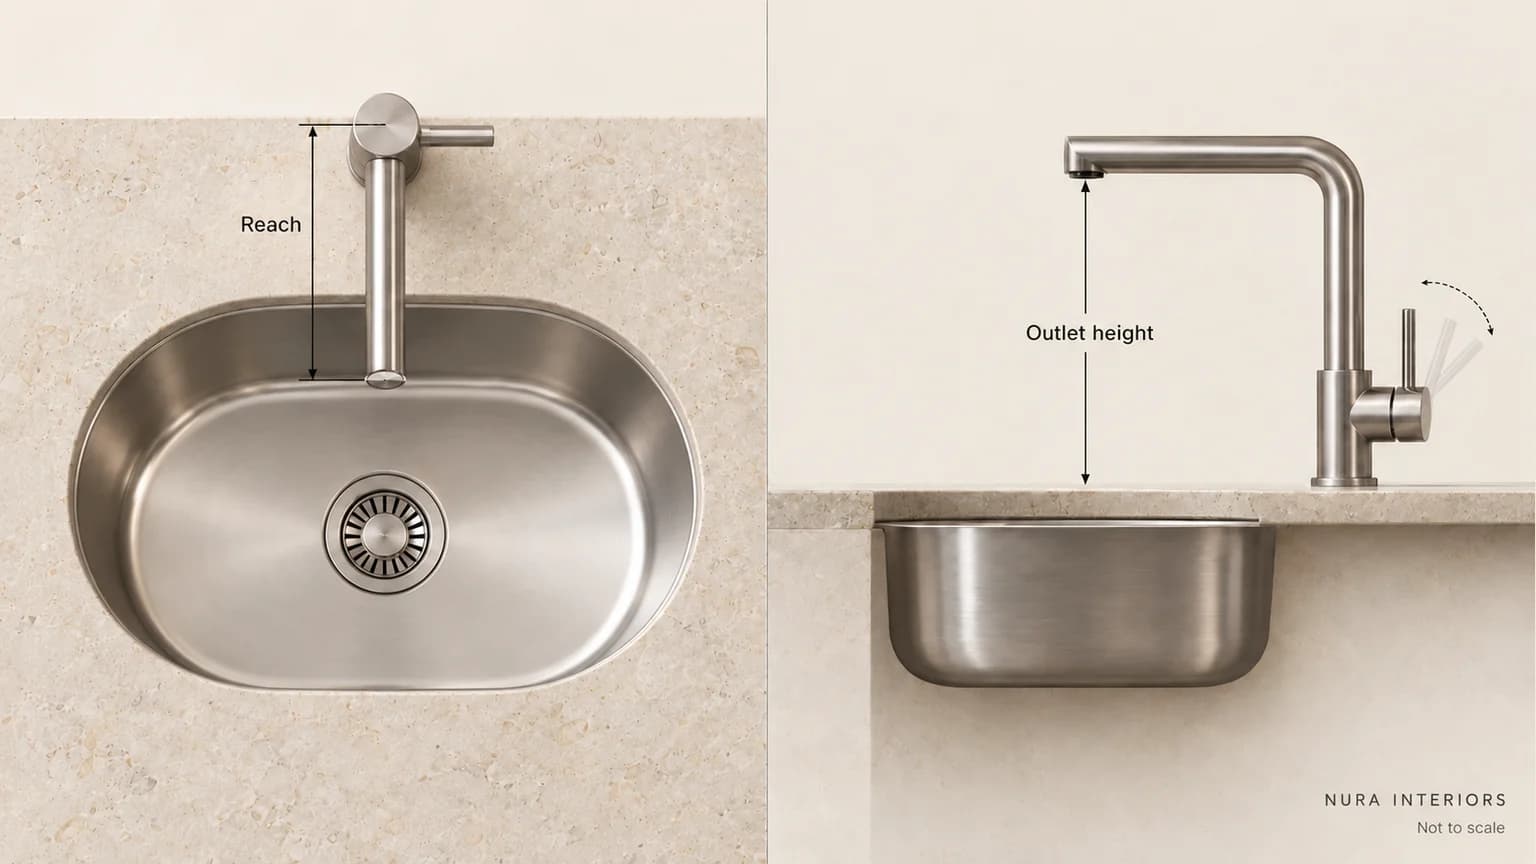

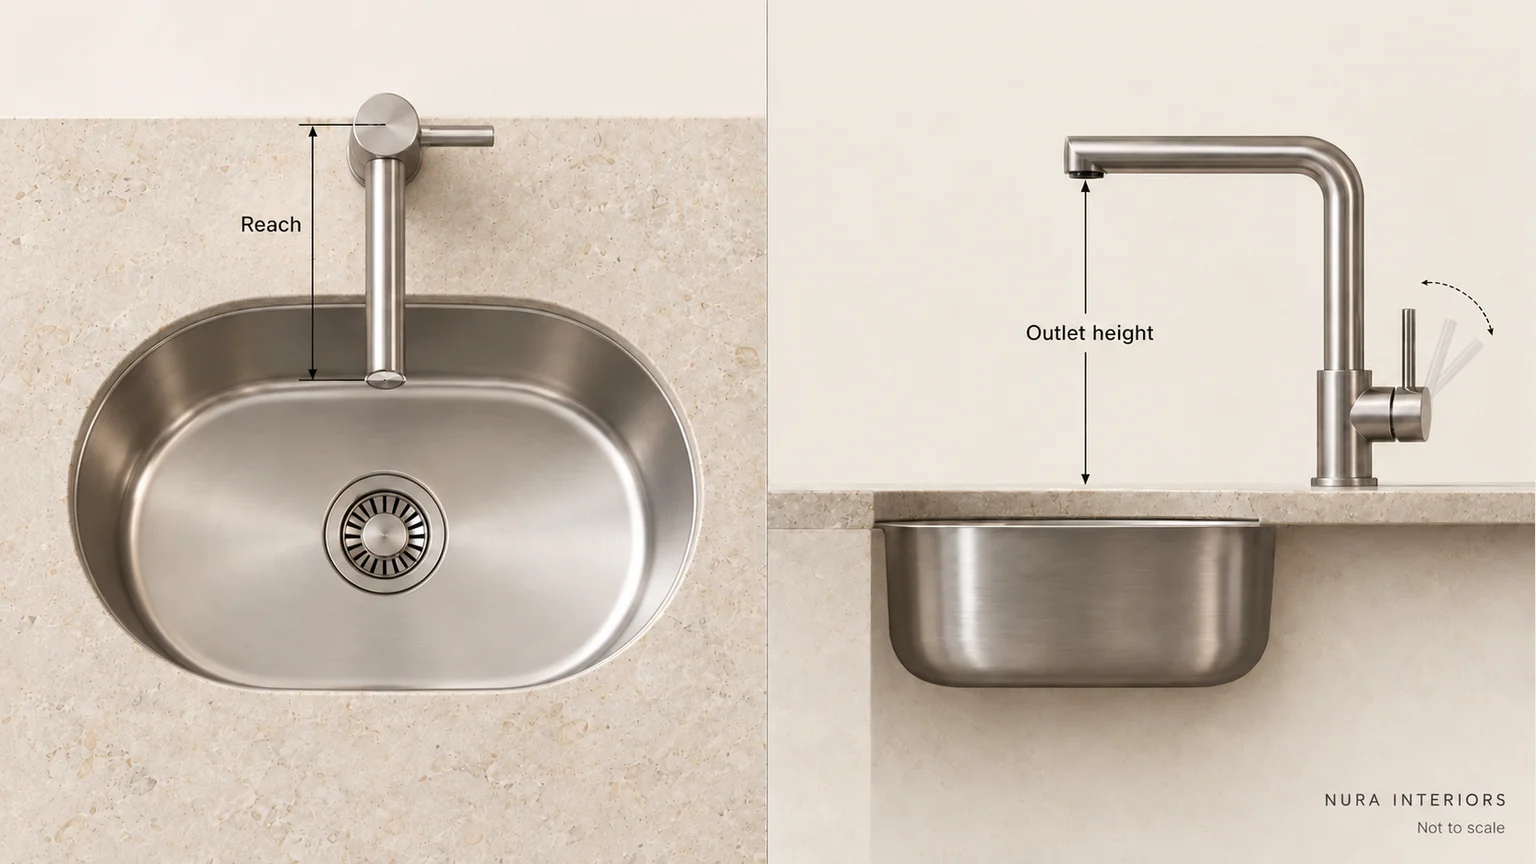
Kitchen tap spout reach is a horizontal measurement, but the right choice depends on where the tap sits relative to the inside of your sink. Put the tap and sink drawings together before choosing by appearance. Then check outlet height and moving parts separately: a taller tap is not necessarily a longer-reaching one.
View the tap and sink diagram at full size. The diagram is not to scale; use the selected products' drawings for dimensions.
Read the endpoints, not just the number
Kohler's measuring guide describes reach from the spout-base centre horizontally to the water stream, and distinguishes it from height to the highest point. For the tap you are considering, use the reference lines on its own drawing. A dimension to the front of the spout is not automatically a dimension to the outlet centre.
Do not measure along the curve of a swan-neck spout. Find the horizontal dimension and its endpoints. Keep overall height and outlet height distinct too; the highest part of an arch does not tell you how much space is below the outlet.
Put the mounting point on the bowl plan
On a plan, identify the proposed mounting centre, the actual bowl opening and the outlet's position using the product drawing. Include the distance between the mounting point and the inside edge of the bowl. The overall sink size alone leaves that relationship unresolved.
For a replacement, imagine keeping an existing tap hole while changing to a tap whose outlet projects further forward. The bowl has not moved, but the outlet's position relative to it has. Compare both arrangements on the same plan rather than assuming the new tap's similar silhouette means a similar fit. If replacing only a spout, ask the supplier to confirm compatibility with the existing tap; reach alone does not establish that the component fits.
There is no single reach number in this guide for every sink. Nor does a plan prove the path of a real water stream or guarantee splash-free use. Ask the supplier and installer to confirm the proposed combination before holes or final fabrication details are approved.
| View | Put on the record | Confirm for the chosen products |
|---|---|---|
| Plan | Mounting centre, bowl opening and outlet position | The drawing's reference points and proposed tap/sink relationship |
| Side | Counter level, outlet height and overall height | Space for your usual items and nearby shelf or window |
| Movement | Lever and spout travel, plus nearby obstructions | The actual operating range and installation requirements |
Check the movement that a still photograph hides
A lever's travel matters beside an upstand or window. For example, Franke's Active L model 115.0653.298 has a forward-only lever. That is a feature of that model, not a rule for all side-lever taps. Check the selected tap's movement against the actual surroundings.
If considering a pull-out spray, distinguish its docked position from use with the hose extended. Follow its installation requirements, including the space needed below the counter. A longer hose does not remove the need to check the original mounting arrangement.
Bring a coordinated sink brief
Keep the tap and sink model references, drawings and proposed mounting position together. Add photographs of any window, shelf or upstand, and identify who will confirm the final arrangement. Connect this with your sink-bowl choice and drying arrangement, so the tap is considered as part of daily use.
Bring that record to a Nura kitchen design conversation. It provides a concrete starting point for discussing the sink area alongside cabinetry and worktop decisions. Ask which relevant examples are available before a showroom visit.